


 Hello! My name is Todd Beuckens and I am a teacher based in Asia. I have been teaching ESL for over twenty years. I have taught in Japan, Taiwan, the U.S. and Thailand. I am currently teaching in Kyuushuu, Japan. I started elllo.org ten years ago and since then have started other sites for educational purposes.
 I'm Shayna, originally from the U.S. but currently based in Brazil. I have a CELTA certificate and several years' experience teaching ESL both one-on-one and in groups. I'm also the founder of EspressoEnglish.net, which provides short, sweet online English lessons.
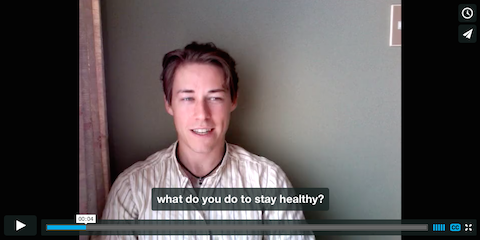
How to Make Captions for Videos
Watch this video and learn how to create captions for videos on hosting services like Youtube and Vimeo.
Why Captions Matter!
For all videos you make, it is a good idea to make captions for the viewers. Captions help videos is many ways.
- They draw the viewer into the material
- They make material easier to understand
- They highlight content the viewer might miss by just listening.
Also, captions are helpful for people who are second language speakers, people who are hearing-impaired, and for people viewing content in a loud environment.
Creating captions is actually very easy to do but you need some software to do it.
For this tutorial we will use the following:
Textwrangler (to format the text file). For PC use Notepad++
MovieCaptioner (to time stamp the text in a .srt file)
Textwrangler and Notepad++ are free. MovieCaptioner is free for the first 14 days. It is well worth the price if you are creating lots of videos.
Now let's look at how to create the captions.
Formatting the Captions
First you need to format the text in a simple .txt file that is UTF-8 or UTF-16. These are just the setting for when you save text on a text editor. For the Mac, you can use Textwragler, and for the PC you can use NotePad++. To prepare the text, write the script, or copy and paste it, onto the a blank text document (.txt file). Be sure the output setting are UTF-8 or URF-16 and not ANSCI. UTF means universal text format, and if allows you to add various characters and different languages on the file with no special encoding.
Once you have the script on the new document, then break up the text into small lines so the text can fit on the screen easily. Try to break the lines where there is a natural pause in the speech. Usually, the end of sentences (periods) and phrases (commas) are the best place to break up the lines. Also, look for conjunctions, both coordinating (and, but, so, etc.) and subordinating (if, when, because).
Creating an SRT File
Next you need some captioning software. I recommend MovieCaptioner. It is the software used in the video above. To use MovieCaptioner you just need to do the following.
Open the software
Load the movie (most video formats will load)
Import for the text (Go Import > Text by Line from the menu bar)
Then Click Set Timecode
As the video plays, everytime the video reaches the end of the sentence, click the Set Timecode again. The sentences will then be marked for the captions.
When done, export as an subrip file (.srt file) and then upload it to either Vimeo or Youtube in the settings panel for the particular video you are enhancing.
And that is it! Once it is uploaded, then people who watch the video can read the captions as they listen.

10 Reasons Teachers Need Websites
Have you ever thought about creating your own website for your students. If so, we have ten reasons why it is a great idea to do so.

Audio Basics
Learn about the various types of audio formats, how to record audio, how to embed audio on a website or mobile site, and basic editing tips and tricks.

Resource Room
Get links to software and useful websites for creating digital content and creating online lessons. Many of the resources are freeware or offer a freemium service.